Selection:
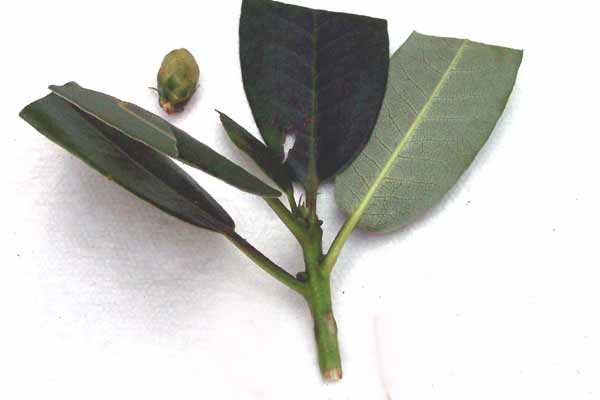
Choose smaller cuttings without flower buds
When I root cuttings, I prefer to take the smaller shoots on my plants rather than big strong growths. I look for branches on the back side of the plant or in shaded spots and try to get stems that do not have flower buds. For one reason, smaller cuttings seem to root more easily for me since they don't need quite so many roots to support a new plant. Also, I hate to cut off any branches that might bloom the following spring. If any cuttings do have flower buds, I remove them since the energy wasted on flowering can go toward root formation
|
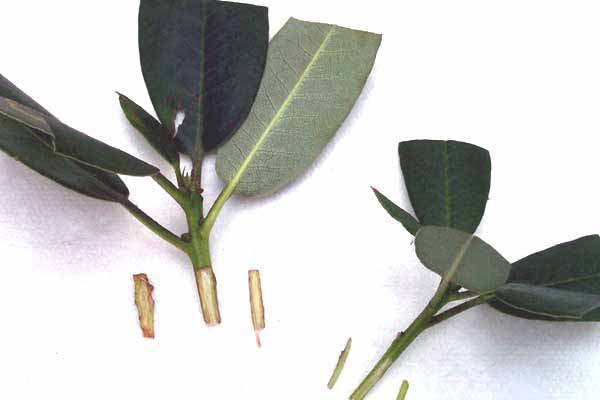
Long cuttings may be cut in shorter pieces.
|
Preparation:
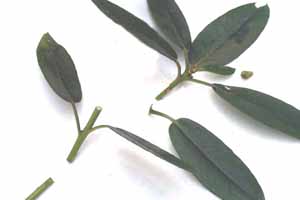
Make short cuttings - trim larger leaves
Rhododendrons are shallow rooted plants and therefore cuttings do not need to be very long. I make short cuttings about 1.5 to 2 inches in length. I also trim the ends of large leaves to make them more manageable. Long shoots can sometimes be cut into several sections to get additional cuttings. If a variety is scarce I might try a few leaf-bud cuttings too. A leaf-bud cutting is single leaf with some woody stem and a growth bud. Leaf-bud cuttings will often root just like normal ones but it is important to keep that bud above ground when inserting the cutting since if it rots, the new growth will never emerge.
|
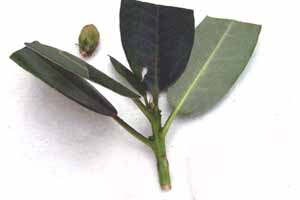
Remove flower buds and shorten leaves.
|
Wounding:
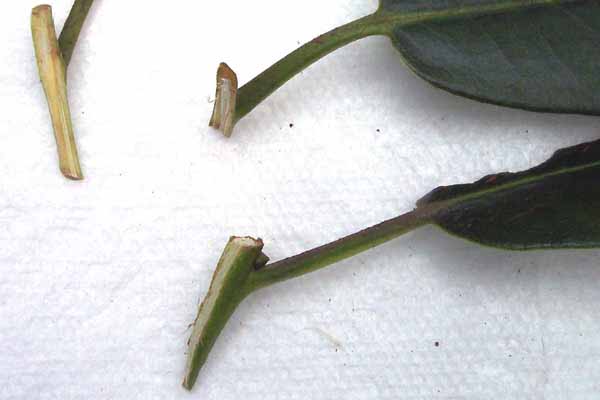
Remove a thin piece of bark from both sides
As the cutting begins its healing process, new roots will develop from callus tissue that forms at the cambium layer of the cut stem. In order to have a larger area for callus development, I cut away a thin sliver of bark from both sides of the bottom part of the cutting. I use a sharp knife so as not damage to the remaining bark since that tissue needs to be healthy for the new callus tissue to grow.
|
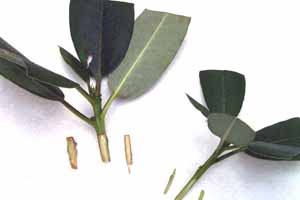
Remove a thin sliver of bark from both sides.
|
Sterilization:
Soak cuttings for 5 minutes in 10% Clorox solution
After trimming leaves and stems, I usually sterilize my cuttings in order to lessen insect and disease problems. I mix 1/2 cup of Clorox with about 5 cups of water to make a sterilizing solution. I submerge the cuttings in that solution for 5 minutes which usually kills most bugs and mold spores. Then I rinse the cuttings well and shake off excess water. Since the cuttings will remain enclosed inside plastic bags for many months, sterilization minimizes potential problems.
|

Try Making a a few leaf-bud cuttings too.
|
Hormones:
Dip cuttings for 5 seconds in Dip 'N Grow
To encourage root formation, most rhododendrons need a little help. I use the liquid rooting concentrate called Dip 'N Grow. For hard to root rhododendron cuttings I dilute in the ratio 1 part hormone to 5 parts water. Azaleas root well with a 1 to 10 dilution. I dip cutting ends in the solution, let them stay for 5 seconds, and then remove.
|

Sterlize Cuttings and dip in rooting hormone.
|
Potting Up:
Insert cuttings, enclose in a clear plastic bag
I insert the cuttings in pots containing a porous medium of equal parts peatmoss, coarse sand, and perlite. The medium should be damp but not too wet since excess moisture can encourage rot. I enclose each pot in a clear plastic bag and place these mini-greenhouses under my fluorescent lights that stay on for 18 hours per day. Cuttings should require no water or care for months. I keep them under the lights until new growth emerges the next spring and then transplant. Some varieties root in 2 to 3 months but stubborn types might take a year.
|

Potted cuttings, enclosed in a plastic bag
|