by Donald W. Hyatt | 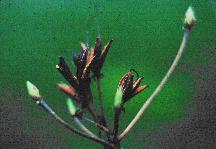
|
|
My procedure for raising rhododendrons and azaleas from seed is rather easy. The process requires some simple materials, viable seed, and a bit of patience, but the results are very rewarding. Seedlings started during the winter months can be planted outdoors the following spring, and in a few years they will provide a wealth of landscape material at practically no cost. Rhododendrons can flower in 3 to 4 years from seed, and azaleas even sooner. Those first blooms will be the most exciting part since every plant will be slightly different. Some may be prettier than their parents and others not as good, but the next prize winner could be in your own back yard too.
The soil mix I use is my standard potting medium for rhododendrons and azaleas: 1/3 peatmoss, 1/3 perlite, and 1/3 sand. I make certain that the sand is well washed does not contain limestone, since rhododendrons do not like salt or sweet soil. I fill the cutoff plastic jugs about 1/2 full, and moisten the medium well, but make sure it is not too wet or soggy. Excess moisture is a serious problem for seedlings or rooted cuttings since it encourages fungus diseases. | |
|
I plant the small seeds directly on the surface of the medium, and try to spread them fairly uniformly, not too close together. I often moisten some very dilute fertilizer solution at this stage but nothing else during the next few months. Sometimes I plant the seed more closely at first, and then prick out small seedlings soon after germination, just as they show their first true leaves. I then transplant them to fresh containers, spacing evenly to allow the seedlings more room to grow.
Seedlings germinate in a few weeks, and grow slowly at first but since the entire system is enclosed, there is no need to water or fertilize. I just watch the leaves expand, imagining what the blooms will look like and wondering where I will put those plants in years to come. Mature rhododendrons are best spaced 6 to 10 feet apart, so a few pots of seedlings can easily plant an acre of land.
| |
 In most cases, seedlings grow undisturbed until I am ready to transplant in the spring. Plants will grow more rapidly if given space, dilute fertilizer and fresh air, but when I am short on time, I have often let them stay in sealed containers for a year or more. Rhododendron seedlings can survive much neglect. If seedlings are too close and the medium too wet, a gray mold might appear which can kill them, but some fresh air and repotting helps the condition. When ready to transplant, gradually open the bags to get seedlings used to lower humidity before the move.
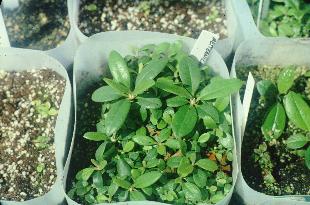
Once in the garden, allow the seedlings grow on their own without too much fuss or care. Natural selection may kill a few of the weaker plants but the others should adjust to local conditions. In a few years you will have a garden full of beautiful rhododendrons and azaleas that are perfectly adapted to your particular environment. Each spring, you will anxiously await the blossoms of old favorites as well as the first blooms of your new seedlings. It won't be long before you are giving away plants to all your friends because you have run out of room.

Copyright © Donald W. Hyatt | |
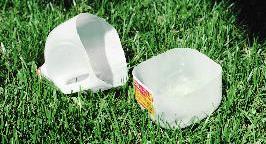 For containers, I often recycle plastic gallon jugs used for milk or bottled water. With a pair of scissors, I cut off the top half of a well-washed jug and make a few slits in the bottom for drainage. These jugs make excellent seed starters but almost any container will do. It is important to find a clear plastic bag that will completely enclose the pot to make a miniature greenhouse for germination. That way, tiny seedlings won't require special care in our dry winter homes.
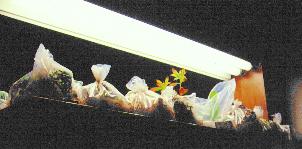 I enclose each container inside a clear plastic bag and place these mini-greenhouses under artificial lights, about 12 inches from the top of the container. An inexpensive "shop light" fixture with two fluorescent 40-watt bulbs can provide enough light for 15 or more pots of seedlings. I keep the lights on for 18 to 24 hours per day, since long days encourage vegetative growth.
Back to my School Web Page